Posts

Showing posts from June, 2023

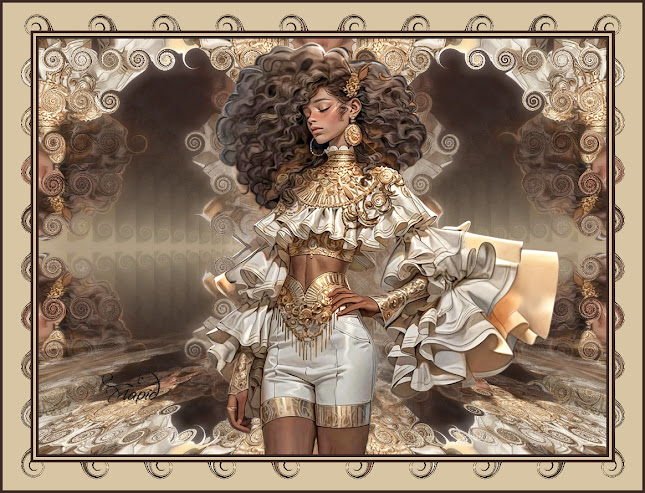
Beauty in Gold

Image
Translated into Dutch by Karin Dank je Karin Material HERE Outside Plugins Used Simple-Pizza Slice Mirror Murameister-Perspective Thank you LinY for the beautiful lady tube! Put the Gradient in your Gradient Folder Set your Foreground to #3c2a27 Your Background to #d7c5a3 1. New Image 1024x750 Fill with the Gradient 2. Adjust-Blur-Caussian Blur 2. Open the Beauty girl-remove watermark-Copy Back to Image-Paste as New Layer Move her to the middle 3. Effects-Image Effects-Seamless Tiling-Default 4. Effects-Reflections Effects-Rotating Mirror 5. Effects-Simple-Pizza Slice Mirror Effects-Reflection Effects-Rotating Mirror 0 6. Effects-Distortion Effects-Curliques 7. Effects-Reflection Effects-Feedback 8. Adjust-Softness-Soft Focus 9. Duplicate Effects-Murameister-Perspective 10. With the Magic Wand-Feather 80 Click on the empty space and press Delete 5 times Select None 11. Open the lady tube-Copy Back to Image-Paste as New Layer Move her to the middle 12. Image-Add Borders 5 with the Foreg

Bird Love

Image
Translated into Dutch by Karin Dank je, Karin Material HERE Outside Plugins Used Simple-Blintz Flaming Pear-Flood Thank you Daniel Sermas for the Overlay Thank you Paula Hagan and Lin Youngblood for the girl tube Open the tubes and Water Overlay Put the Blanche Renee Script in your Scripts Restricted Folder Set your Foreground to #375c6e 1. New Image 1000x650 Fill with the Foreground 2. New Raster Layer Select All Open the girl tube-Copy Back to Image-Paste into Selection Select None 3. Effects-Image Effects-Seamless Tiling-Default 4. Adjust-Blur-Radial Blur Merge Down 5. Effects-Distortion Effects-Displacement Map 6. Effects-Simple-Blintz 7. Effects-Reflection Effects-Rotating Mirror 8. Effects-Distortion Effects-Pinch Duplicate 9. Effects-Flaming Pear-Flood 10. Selection Tool-Rectangular-Feather 80 Go around the top of the flood level Press Delete 4 times Select None Set this Layer to 'Hard Light' - Opacity 50 11. Back to Raster 1 Do the same Distortion-Displacement Map as be

Blue Fantasy

Image
Material HERE No Outside Filters Used Beautifully translated into French by Manou Merci Manou! Open the background, misted woman and mask Put the Gradient into your Gradient Folder 1. New Image 1000x 800 Fill with the Gradient 2. Effects-Reflection Effects-Rotating Mirror 3. Set your Foreground to #47568c New Raster Layer Fill with the Foreground Layers-New Mask Layer-From Image Merge Group Effects-Edge Effects-Enhance More 4.Effects-Reflection Effects-Rotating Mirror Duplicate-Merge Down 5. New Raster Layer-Select All Open the Flower Background-Copy Back to Image-Paste into Selection Select None 6. Effects-Reflection Effects-As Before Duplicate 7. Effects-Image Effects-Seamless Tiling-Default Merge Down 8. Effects-Artistic Effects-Neon Glow 9. Open the Misted Woman Tube-Copy Back to Image-Paste as New Layer Resize 75% Move her just a little to the right 10. Duplicate With the Eraser Tool set to size 100 Go around the woman, leaving only the face Merge Down This is what you should have

Rodeo Girl

Image
Material Here Outside Plugins Used Murameister Perspective Open the tubes, the background and the misted background 1. New Image 1024x750 Select All 2. Open the Horse Background-Copy Back to Image-Paste into Selection Select None 3. Effects-Reflection Effects-Rotating Mirror 4. Duplicate Effects-Murameister Perspective 5. Magic Wand-Feather 80 Click inside the empty space about 2 or 3 times Select None Move this layer down a bit, so those eyes aren't looking at you 6. Effects-Reflection Effects-Rotating Mirror 7. Open the Misted Horse-Copy Back to Image-Paste as New Layer Move it to the middle Duplicate Merge Down 8. To get rid of those shadows around the horse Use the Delete Tool and caefully go around it 9. Open the Rodeo Girl-Copy Back to Image-Paste as New Layer Move her to the left 10. Effects-3D Effects-Drop Shadow 11. Open the Wagon Wheel-Copy Back to Image-Paste as New Layer Resize 50% Move it to the right Duplicate Set this layer to 'Hard Light'-Opacity 50 Drop Sha

Geisha Girl

Image
Material HERE No Outside Plugins Used The lovely Geisha girl is AI Generated by Daniel Sermas Open your tubes and mask Put the gradient in your gradient folder Set your Foreground to Gradient and Background to Black 1. New Image 1024x750 Fill with the Gradient 2. New Raster Layer-Select All Open the Geisha woman-Copy Back to Image-Paste into Selection Select None 3. Effects-Image Effects-Seamless Tiling 4. Adjust-Blur-Caussian Blur 5.  Effects-Texture Effects-Straw Wall 6. Adjust-Add/Remove Noise-Despeckle 7. Effects-Reflection Effects-Rotating Mirror 8. Effects-Edge Effects-Enhance Merge Down 9. Open the Geisha House-Copy Back to Image-Paste as New Layer Move to the left 10. Effects-Image Effects-Seamless Tiling-side by side Effects-Edge effects-Enhance 11. New Raster Layer Fill with Black Layers-New Mask Layer-From Image Merge Group 12. Image-Mirror-Mirror Horizontal Effects-Edge Effects-Enhance More Set the layer to Luminance and Opacity to 70 13. Image-Add Borders 5 Black Image-Add