Posts

Showing posts from May, 2024

Artsy

Image
  Material  HERE All Images AI created and tubed by me  Feel free to use them No © needed  But please don't sell them as your own Outside Plugins Used Alienskin-Impact-Glass A Plugin Site  HERE Set your Foreground to Black Background to #fdd362 1. New Image 1024x750 Fill with Black 2. New Raster Layer Fill with #fdd362 3. New Mask Layer-From Image Merge Group 4. Effects-User Defined-Emboss3 5. Drop Shadow 6. Magic Wand-Feather Nil Make a Selection in the middle as shown 7. New Raster Layer Open the background-Copy Back to Image-Paste into Selection Select None Same Drop Shadow Close this Layer for now 8. Back to the Mask Layer With the Selection Tool-Feather Nil  make a selection on the 4 corners as shown Promote Selection to Layer 9. Effects-Alienskin-Impact-Glass-Clear Select None Same Drop Shadow 10. Open up the background Layer again Set the Opacity to 85 11. Image-Add Borders 45-Black 12. Magic Wand-Feather Nil Click inside the Black Layer Promote Selection to Layer 13. Set yo

Maya

Image
  Material  HERE All Images AI created and tubed by me  Feel free to use them No © needed  But please don't sell them as your own No Outside Plugins Used Put the Gradient into your Gradient Folder Open your material Set your Foreground to Black Background to #c3a271 1. New Image 1024x750 2. Open your background-Copy Back to Image Paste as New Layer Merge Visible *Please Note: If you use another background, you might want to do the Select All-Paste into Selection-Select None 3. New Raster Layer Fill with Black 4. Layers-New Mask Layer-From Image Merge Group 5. Selections-Select All-Selection Float 6. Set your Foreground to Gradient 7. Fill the Selection with the Gradient Keep Selected 8. Effects-3D Effects-Inner Bevel Select None 9. Close off the Background Make sure you're on the Mask Layer 10. Magic Wand-Feather 1 Click inside the Middle 11. Back to Background Layer-Open Selections-Invert 12. Effects-Texture Effects-Mosaic Glass 13. Promote Selection to Layer Select None Put t

Mama's Shoes

Image
Material  HERE The lovely lady with the red shoes was AI created by Karin Courbois and tubed by Lin Youngblood The lovely little girl was found and tubed by Lin Youngblood Thank you ladies! Rest of the material made by me  Feel free to use them No © needed  But please don't sell them as your own Outside Plugins Used Greg's Factory Output-VolumeII-Pool Shadow A Plugin Site  HERE   Open your material 1. New Image 1024x750 Select All 2. Open the background-Copy Back to Image-Paste into Selection Select None 3. Adjust-Blur-Radial Blur 4. Duplicate Set this Layer to 'Hard Light- Opacity 45 Merge Down 5. Open the Shoe-Copy Back to Image-Paste as New Layer Resize 85% Place it as shown 6. Open the Lady-Copy Back to Image-Paste as New Layer Resize 50% Set the Opacity to 75 7. Image-Add Borders #931b17 8. Magic Wand-Feather Nil Click inside the Red Left Border Promote Selection to Layer 9. Effects-Greg's Factory-Pool Shadow-Default Set this Layer to 'Multiply' Select None

Shanti

Image
  Material  HERE All Images AI created and tubed by me  Feel free to use them No © needed  But please don't sell them as your own Outside Plugins Used Simple-Pizza Slice Mirror Xero-Porcelain A Plugin Site  HERE Put the Gradient in your Gradient Folder Open your Material 1. New Image 1024x750 Fill with the Gradient Select All 2. Open the Lady-Copy Back to Image-Paste into Selection Select None 3. Effects-Image Effects-Seamless Tiling Side by Side 4. Effects-Simple-Pizza Slice Mirror 5. Effects-Reflection Effects-Rotating Mirror 6. With the K Tool on your keyboard Pull up the top and bottom of the image Untill you have something like this Press M 7. Open the Bed-Copy Back to Image-Paste as New Layer Resize 75% Place it as shown 8. Drop Shadow (If you find the bed is too bright, set the opacity to 85) 9.  Open the flower-Copy Back to Image-Paste as New Layer Resize 25% Place it to the left as shown Same Drop Shadow Opacity about 85 10. Duplicate Image-Mirror-Mirror Horizontal 11. Ima

Buskers

Image
  Material  HERE All Images AI created and tubed by me  Feel free to use them No © needed  But please don't sell them as your own Outside Plugins Used Simple-Centre Tile A Plugin Site  HERE Put the font in your Font Folder Or if you have Font Runner-Open it in there Open your material 1. New Image 1024x750 Select All 2. Open your Background-Copy Back to Image-Paste into Selection Select None 3. Effects-Simple-Centre Tile 4. Effects-Reflection Effects-Rotating Mirror 5. Open the Misted Background-Copy Back to Image-Paste as New Layer Move it to the right Press K and pull it down and left a bit Press M 6. Open the shopper-Copy Back to Image-Paste as New Layer Resize 20% Place her to the top right as shown 7. Open the Lady Busker-Copy Back to Image-Paste as New Layer Resize 55% Place her bottom left 8. Drop Shadow 9. Open the Child Busker-Copy Back to Image-Paste as New Layer Resize 30% Place him next to the Lady as shown Same Drop Shadow 10. Open the Shoes-Copy Back to Image-Paste as

Hope

Image
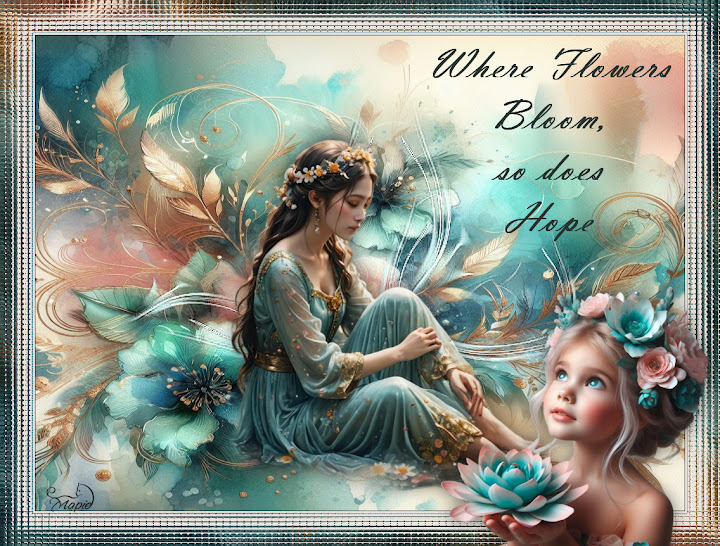
  Material  HERE All Images AI created and tubed by me  Feel free to use them No © needed  But please don't sell them as your own No Outside Plugins Used Put the Blanche Renee Script into your Scrips Restricted Folder Put the Brush Text into your Brushes Folder Open your material 1. New Image 1024x750 Select All 2. Open the Background-Copy Back to Image-Paste into Selection Select None 3. New Raster Layer Fill with the colour #cff7f2 4. Layers-New Mask Layer-From Image Merge Group 5. Effects-Edge Effects-Enhance Duplicate Merge Down 6. Open the Lady-Copy Back to Image-Paste as New Layer Resize 75% Place her as shown 7. Drop Shadow 8. Paintbrush-find the text brush  with these settings Set your Foreground to #26322e And click two or three times 9. Run the Blanche Renee Script 10. Magic Wand-Feather 2 Click inside the Outer Border 11. Effects-Reflections Effects-Kaleidoscope Keep Selected 12. Click inside the Inner Border So now both borders are selected 13. Effects-Texture Effects-M

Crimson and Lace

Image
  Translated into Dutch by Karin Dank je, Karin Material  HERE All Images AI created and tubed by me  Feel free to use them No © needed  But please don't sell them as your own Outside Plugins Used Filter FactoryG-Xaggerate A Plugin Site  HERE Set your Foreground to Black Background to #ff0000 Gradient 1. New Image 1024x750 Fill with the Gradient 2. Effects-Filter FactoryG-Xaggerate 3. Effects-Reflection Effects-Rotating Mirror 4. Effects-Geometric Effects-Circle 5.New Raster Raster Layer Fill with Black 6. Layers-New Mask Layer-From Image Merge Group (If you want it like the 2nd Image, Delete some of the mask, as shown) 7. Open the Wine Glass-Copy Back to Image-Paste as New Layer Resize 25% Place it to the right as shown 8. Drop Shadow 9. Duplicate Image-Mirror-Mirror Horizontal 10. Open the Lady-Copy Back to Image-Paste as New Layer Resize 60% Place her in the middle and pull it down a bit 11. Set your brush to 'Change to Target' Set your Foreground to #ff0000 And colour t